Friday, July 7, 2023

The next step (part 3; mock up)


A good idea.

It is a good idea, isn’t it? Something like this really ticks a lot of boxes for me. We have the front siding, where we have a workshop where, if I’m clever. The inside should be able to be viewed without any problem. I like detailed workshops. There’s one on Give Way to Trains, and many years ago there was one on Purespring Watercress. I like tools. I’m not mechanically minded enough to use them. But tools are a great detail to fit into a workshop scene. Hopefully I can make something work in there. We need to start mocking up.
The first thing I work with when mocking up, is what I call the “Train Length Unit” or TLU. How long will a typical train length be on a micro layout?  It dictates what you can do in an area. It’s no good having a 4’ (1220mm) TLU on a 4’ long layout. It can’t move.
My TLU will be based around a short loco like the LocoRemote MotorRail and a couple of Binnie tippers. 
TLU = 11” 280mm
As you can see, the TLU is very short for such a large scale. On a 4’ long layout, the train will travel its own length four times. Which I feel is a pretty good minimum for a micro layout. With that detail ironed out, I felt I could start the mocking up.
The tipper
Let’s start with the tipper vignette. What should the height of the rails above the ground be? In the Sydney Leleux article in The Review, he states that if the material was being tipped into a standard RCH wagon that height should be  about 10 feet. Ten scale feet would be 160mm (about 7”). As I’m not planning on tipping into any vehicles (road or rail), I decided to go with what looks right. I added a couple of chaps from Give Way to Trains to the scene for scale. The rails are above them. But not too far above. In this image the rails are 120mm (just under 5") that’s about 2.3 meters or seven and a half feet in the real world. Not bad. I'm inclined to think that any taller would look too tall, especially given the narrow baseboard. This is being mocked up on a piece of white expanded polystyrene sheet 4' x 14" in size, and the layout will likely be the same size.
A workshop
Now the workshop. Its primary purpose is to to hide the exit to the sector plate/fiddle stick. It could be a fully modelled building, or it could be part relief, or even built to fit the site. Depending on the structure. Clearly there's plenty of room to fit a structure in there. The siding poking out of the building is a nice place to pose items for layout viewers and photographers. The scope for detailing around the workshop with scrap, spare parts and other detritus is enormous.
Overall view
Overall things look pretty good. I like what I see a lot. There's a lot of space. For a large scale in a small space. It's almost empty. I put my Land Rover in there to see if a truck could be fitted in to be loaded. A small one probably. But in these days of Radio controlled vehicles on model railway layouts I'm not sure there would be the room for one to operate. The trees that I sketched into the original concept will probably have to go. Or at least be smaller low relief ones, from the way I see things going together. So with a quick sketching over the mock up photo. You get this…

I think it will work.


Thursday, July 6, 2023

The next steps (part 2 inspiration sets in)

How do we get from this: That I see set in the Minnesota Northwoods in On30

To something in England in 16mm scale?
It's all about inspiration. In issue 134 of Narrow Gauge and Industrial Railway Modelling Review there was an article by Sydney A. Leleux about emptying side tipping wagons. As you may know I'm a firm believer in working features on micro layouts, and tippers fit that bill perfectly. 
There was a picture on p.278 of the loading of a lorry at George Garside's Double Arches quarry. The rail line sits on a raised, wood surfaced tipping dock, surrounded by bare trees. It must be a winter scene. A tarpaulin is draped over a fence. There’s a corrugated iron shelter around the tipping chute on the wooden loading dock. A large brick building has a small lean to shed attached to it.
Chris’s concept sprang to mind. Why it did so, I don’t know. Like I said, the idea had gone on the back burner until the time was right. The time must be right. I don’t argue with my creative mind. A wooden dock. I had imagined a wooden dock in Chris Mears scheme. There’s a wooden dock in this image. That must be it. Like I say, I don’t argue with my creative mind.
I searched out other images of Garside’s and other plants. There are so many inspirational pictures of 2’ gauge railways around Leighton Buzzard, where Garside’s was located. But nothing as inspirational as the picture in The Review. 
Ideas come thick and fast. A two level scheme… With a front low level siding in a yard and the tipping dock at the rear perhaps?.. Difficult to work between the two levels in the offstage sidings… Cassettes, or a fiddle stick or a sector plate… Keep tracks on the same level… 
I found a picture of  a “Loco Shed” at Double arches. A wonderful concrete block and asbestos roofed structure, full of character… Perhaps this could be my scenic break at the right hand side... Perhaps that might be a bit big in the confines of the micro… A smaller workshop then?.. A line runs through the workshop… There are bins at the foot of the tipper… Look at this picture… Big bins… Wait a minute… Is that different grades of sand/gravel in the bins?.. Certainly different colours of material… That could work… Tipping two different grades of materials into different bins…Make the bins removable for ease of emptying…  
I felt that it could turn my scribbling and scratchings on paper into some kind of coherent sketch.
First coherent concept sketch
Ooh. We’re getting somewhere. I love sketches like these. So free and unencumbered by niceties like track geometry, clearances and suchlike. I feel the need for some mocking up. 
But that’s a story for another post.


Wednesday, July 5, 2023

The next steps. (part 1 introducing the catalyst)

Moving on from "Give Way to Trains". 
I have for a while, been considering the best way to expand on my new found enthusiasm for 16mm scale micro layouts. 
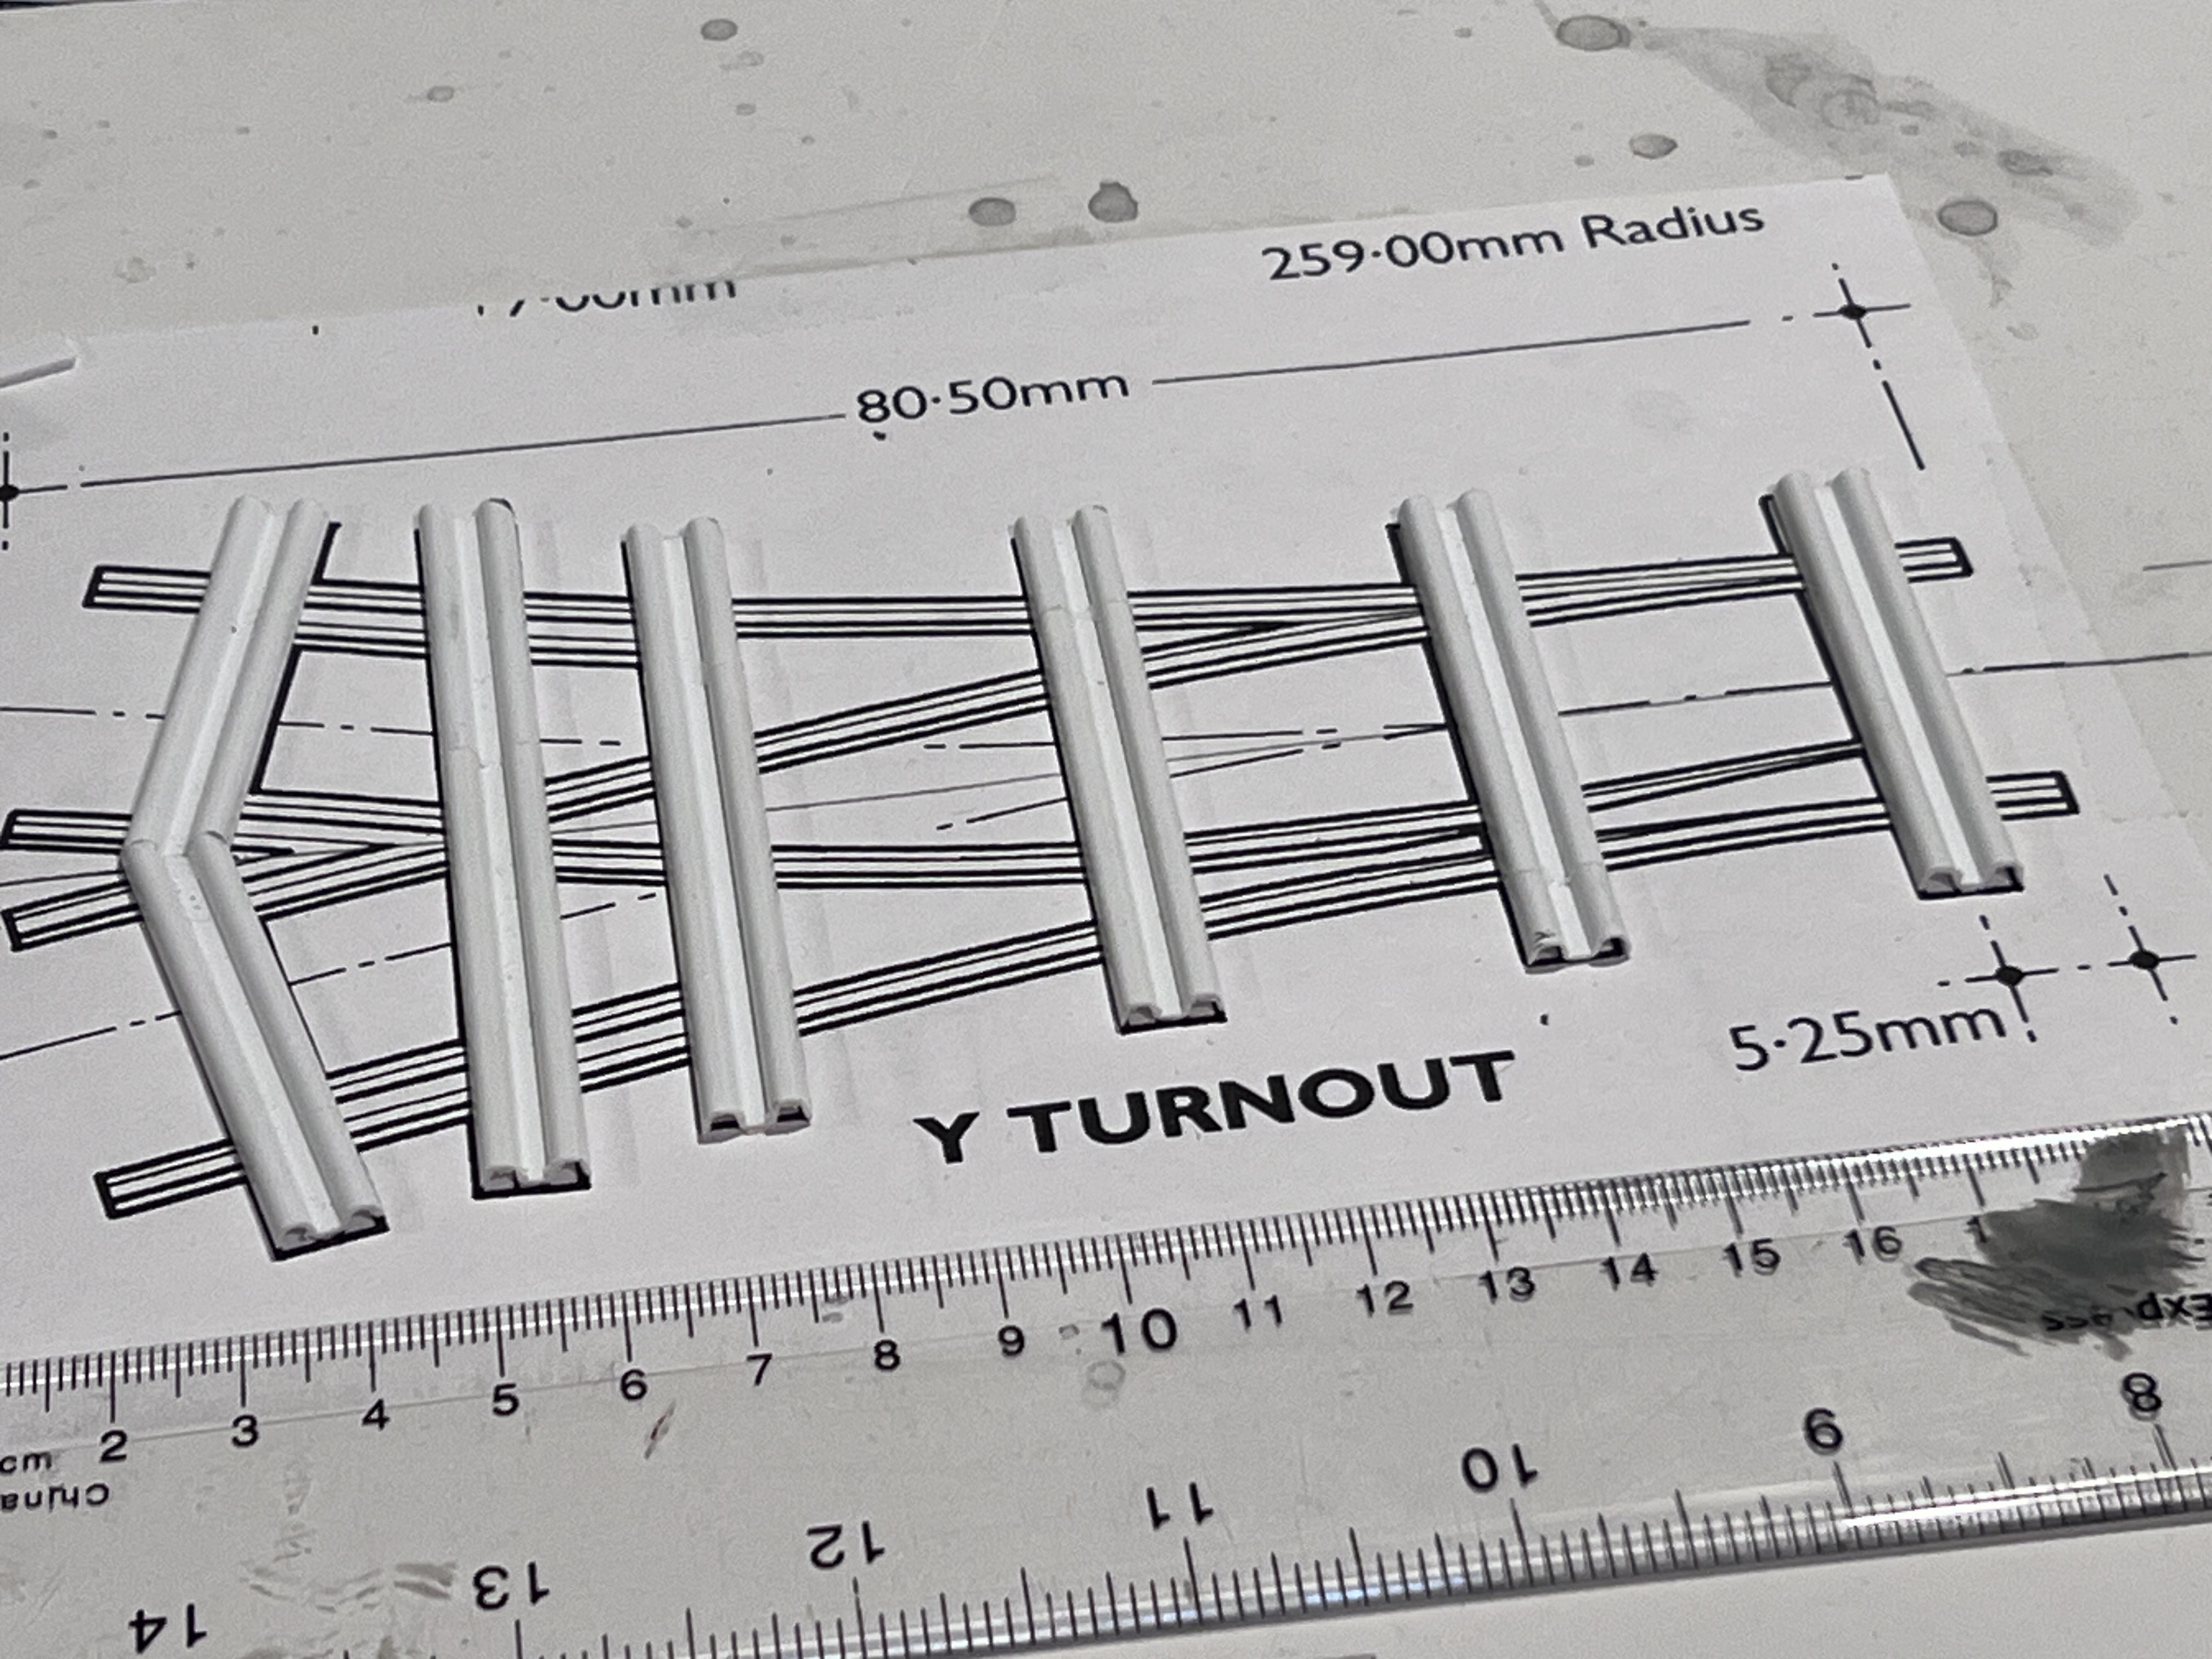
One thing I was considering was an extension to the original Cartel Challenge layout. This was the reason I built the Y turnout. At least one turnout would have been needed on the layout extension. I didn't enjoy the project, even though I have something that I'm proud to have made. I found the removal of the sections of rail that was needed to get everything to work tiresome and hard work. It's not like working with code 75 bullhead rail in 4mm scale, where the rail is trimmed to size and shape with some strokes of a file. Working with code 148 rail involved cutting sections of rail away with a track cutting disc. I didn't enjoy it at all. That's OK we all have aspects of the hobby we don't like. If I was modelling in any other scale I could buy turnouts. But that's not possible in 16mm scale. There are no R-T-R turnouts. There are downloadable .stl files for 3D printed track, But I've already established my track construction method, and wouldn't want to change from that. While I'm not a huge fan of hand spiking track, I can tolerate it more than filing, cutting and grinding code 148 rail.
What to do then?
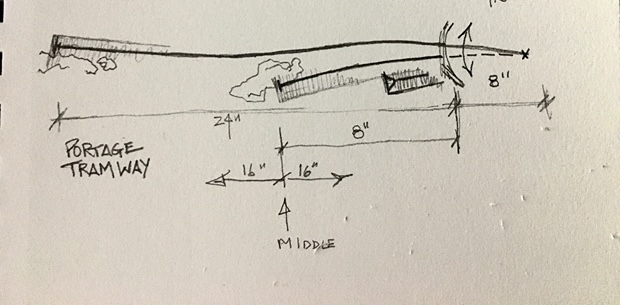
There are only two blogs on the internet that I check everyday. One is James Hilton's "Paxton Road". James updates his site daily. There is always something skilled, interesting, and/or thought provoking to read. The other one I check is Chris Mears' "Prince Street". Chris' blog is like the tide, it comes in and out. Sometimes he posts regularly. Sometimes he goes for a while without an entry. But I find that if I don't check it, then I miss something interesting. Like back in September of last year when he posted this conceptual sketch for an idea of his called "Portage Tramway".
A catalyst
It might not look like much to those of you who hanker after long freight trains rumbling across the prairies or high speed passenger trains. But if you like sleepy narrow-gauge and industrial lines. Then you might get something out of it. 
Let's start with the name "Portage Tramway". If you live in Minnesota, portage is a word you become very familiar with:
Portage is the practice of carrying water craft or cargo over land, either around an obstacle in a river, or between two bodies of water. A path where items are regularly carried between bodies of water is also called a portage. The term comes from French, where porter means "to carry," as in "portable".
There are portages all over the Boundary Waters Area Canoe Wilderness in Northern Minnesota. That's what sprung to mind as I looked at this. Somewhere to run my Bachmann On30 stock. 
A short narrow gauge railroad runs between a couple of lakes, taking freight and people about their daily lives. A vital lifeline in this vast remote area of the state. A couple of short sidings sitting on a rocky lake shore are all the railroad has here. A short one with a timber passenger shelter on it for passengers and a longer one, to a dock on the lakeshore. It certainly conjures up atmospheric images in my minds eye every time I think about it.  My Bachmann Railbus could shuttle in and out of that passenger platform all day and keep me happy, while my Porter or other small loco shuffles freight off and on the dock, maybe spotting a car in the platform road to make a switching move.
But it's one heck of a long way from a 16mm scale industrial micro layout. But conceptually, it's not a huge leap.
It's the idea presented that's important here. There are two different worlds in this scheme. The short siding and the long one. Do you want viewers to admire the effort you put into a loco or some rolling stock? Sit it on the front siding. If you want to lose yourself in the moment, set a train slowly down the rear siding. A train doesn't have to travel far, for you to loose yourself in it and forget it's only covering a few feet in the real world. All appealing ideas.  
So I did what I always do, stuck the idea on the back burner, knowing full well when the time was right it would re-emerge.
So lets take a breath before this post gets any longer and meandering like a stream to portage...


Wednesday, June 28, 2023

What’s the point. Part 3.

I couldn’t leave my proof of concept work unpainted for long. A quick spray with a Tamiya Dull Red and a light earth from a couple of rattle cans then a little ballast between the track and there you go. A quite acceptable piece of work.


Tuesday, June 27, 2023

What's the point. Part 2.

 Nice and recovered after my marathon I felt ready to finish off the turnout. The onerous task facing me was the spiking of the rails. 
Some people like spiking rail, some don't. I've not decided where I sit in the two camps. I don't particularly enjoy the task. It's something I have to be in the mood to do. But it's pretty much the only way to do what I want to get the effect I'm after. Out came my spikes and spiking tool  and away I went.
All the parts ready to go. The rail is code 148. That's a LOT of rail to cut and file away to make blades and vees. That took quite some time, and all the while I was fettling them. Filing a bit here and there to make the blades fit as I assembled the track.

I started at the vee. I really should have modelled the turnout with a crossing reinforcement plate. As it would supply some support to the vee. It could have been superglues to the plate, along with parts of the wing rails, should I make another. 

The blades, a lot of filing to be done on these to get them to fit. A tie bar system will have to be devised.

Done. For now. It needs a reliable pivot system for the blades and a tie bar. There's no doubt that it looks the part. But all the filing and spiking. It's just something I need to be in the mood for.

A vee skip chassis will navigate the turnout carefully

A last look at the project.
There we are then. I'll probably call this one good and give it a rusty paint job, like I did my original section of track, and put it on a shelf and look at it. Like I say, I don't know if I'll make one for a layout. I find spiking quite tedious and the filing of the rails hard work. Even with a Dremel to help things along. People with a proper workshop would be able to mill the correct profiles for the blades and vee in an instant.
Don't get me wrong, I feel great about the achievement. Perhaps I'll change my mind at some point. 


What’s the point part 1

Over the past month or so, I have been working on something pretty important as I think about extending the original micro layout. 
I’ve been building a turnout. You’ll all be familiar with my method of building plain track using Plastruct embossed corrugated sheet. I needed to know if this construction method would work for turnouts. I know there’s lots of people 3D printing turnouts, and I may well go that way. But first I have to know if my method of track building would work. 
I decided to build a Y turnout from the drawing in the late Roy Link’s Industrial narrow gauge handbook.
I enlarged the drawing to size and got to work. I shall try not to bore you with a ‘How I blew my nose” approach to describing the work. Just list the significant steps. Suffice to say the method of building turnouts is little different whatever scale or track you use.

The template from the Roy Link handbook, blown up  and taped on a board. During an earlier rush of blood to the head, I had cut all my embossed styrene into sleeper lengths. In order to get the correct length sleepers I had to glue them together. Each butt joint was reinforced with styrene strip in the channels.

A lot of people asked me about my railbender. This is it. I found it on eBay from a seller called harrgar52. It looks to be an adaptation of the tool for removing watch backs, that has been described in the model railway press in the past.

Stage 1. Cut all the sections of rail to size. I made multiple easy passes through the railbender in order to get the curvature correct. The rail came from some sections of Atlas O scale 2 rail track. I think that makes it code 148. 
A simple jig was needed for the crossing vee. Just a couple of pieces of wood set to the correct angle. Filing the rails to the correct angle of the vee, gave me a good idea of how much rail would have to be removed for the blades. A lot.

Then I had to leave the project for a couple of weeks as I prepared to run my 24th marathon.


Wednesday, May 10, 2023

Some Progress Photos.

It's been a bit quiet hereabouts while I devoted some attention to my US outline O scale project Minneapolis Fork, and now with the weather picking up and I am able to to some spray painting outside. With all that done I thought I'd put everything together to get a quick feel for the progress. I hope you like these images.

An empty yard

An almost new skip wagon is in the workshop

Motor Rail gets ready to head out with the fuel bowser wagons

Brush loco “Amberley” shoves a skip loader with stone into the unloaded
The images look OK. I’m quite pleased with them.


*Fy Merlen Bach*

Winter is coming…The phrase that spawned hundreds of cringeworthy internet memes. To me it means that any model making I do will be confined...