Wednesday, September 14, 2022

A change of track?

The track is down, and after a few sprays of dull reds and browns. It looks like some rusty old track that's been laid in the country somewhere. 


But where? This really still isn't established yet. I've floated several ideas in the past few weeks. But we're really still no closer to getting the final subject really tied down. Peat. Shale oil. Sea Defences. No idea. Then I saw a post on Claus Neilsen’s Nystrup Gravel Blog about a Land Rover. Now I love Landy’s. The older the better. I have fond memories of riding in an old series 1 Landy with my dad as a child. A Landy on any layout of mine is a good idea. A Land Rover appears on my 00 scale “Nowhere Road Halt”. There are 1:18 scale Land Rovers out there. The temptation is strong. I even did a little quick sketch throwing a Landy in there.


I'm a little unsure of the size that a Landy would take up. A short wheelbase series 1 isn't very big, but in this scale is about 5" long. It would fit in the front corner area that I've drawn it in and it would certainly present an unusual view block. I doubt that the workshop would fit there to though. In that case it could be moved to the rear. 

But putting the Landy in there reminded me of home and my other great rail interest. The Potato Railways of Lincolnshire. I've been planning a Potato Railway scheme for the longest time. Yes. there's even a blog for it out there, untouched for two years. There were about 140 miles of railways serving potato farms in Lincolnshire. The majority of the miles were taken up by two systems. Nocton Estates, near Lincoln and Fleet Farms near Holbeach in the south of the county. But most of the lines were short, barely a couple of miles long, sometimes only a few hundred yards. Lines that ran from the middle of a field to a loading dock alongside a road. Hand worked or horse worked.  There's a fascinating book on the subject by Stewart Squires, that will tell you everything you need to know about even the shortest of lines.

The book contains many inspirational images that I have imagined schemes around. But nothing has stuck. Perhaps in this instance I’ve been trying too hard. I do sense a germ of inspiration here though. I think I need to take another look at Mr Squires book and see what I can find.

Saturday, September 10, 2022

LocoRemote “Huddy” part 2

Proceeding quietly in the background as I design the layout. Is the making of “Huddy”. The initial assembly was wonderful. All the parts fitted together perfectly, which really impressed me.

It sat for a few weeks while I decided what colour to paint it. Green? Blue? Red? I didn’t know. In the end I plumped for Red. Revel Italian Red to be exact. I thought this gave more of a Ransomes and Rapier feel to it.  The loco is pretty well finished now so I can share these pictures with you.

The HUDDY wording was picked out with a gold paint marker

There's little light weathering on the skip frame as well.

Picking the brake wheel out in white is a touch that I like. The black box you can see under the skip frame houses the motor

All in all, I think it looks quite passable.

I have a driver lined up for Huddy. He's from Narrow Minded Rail Works. He sits well in the cab, and looks like he could be holding onto the brake wheel or more probably resting his hand on the loco bonnet. There is even space under his feet for pedals which is a detail I'd like to get in.

The driver will be handed over to my wife for painting


The WiFi Control PCB and battery are a snug fit

The simple drive set up

The loco is powered by a small motor that sits under the skip frame. You can see the box that surrounds the motor in one of the photographs and it drives both axels by means of rubber bands, technically they are nitrile O rings, but that doesn't sound as warm and friendly. It's a snug fit as is all the control  gear and battery as you can see from the photograph. You think that it all won't fit in there but it does. And the LocoRemote control works very well indeed. Slow speed running is impressive and as there's no current to pick up from the track  it's all very smooth and faultless.
As a first 3D printed kit in 16mm scale it was a great experience. Simple to build and plenty of room to add details to suit. I have two other LocoRemote kits to build and I'm really looking forward to them.

Wednesday, September 7, 2022

Baseboard Construction

(This is reproduced from one of my other blogs. This recounts how I built the baseboard from foamcore board)
Gone are the days of wood being needed to build model railway baseboards. Even more so in the world of Micro layouts. 
Wood still has its place of course, like in the APA box and baseboard kits. But there are plenty of alternatives available, like pink and other coloured insulation foams. Gator foam and foam core board. 
Not everyone has the ability or facilities to work with wood. These newer, lighter materials are a boon.
I have been experimenting for quite some time with foam core board. Some people pass it off as a poor alternative to gator foam. They find the wood fibre surface of gator foam superior.
Gator foam is of course, quite expensive, so you might as well use wood if you're going to spend that much money. 
Over the past few years, I've been working with foam core board to see how it performs over time. I've built a few test baseboards, using differing methods of construction. The largest being 20" x 30". It has been in storage for a couple of years and it has remained flat, level and square in all that time. 
There are a few different makes of foam core board and my successful experiments have been with (for US modellers) Elmers. 
They have a whole range of foam core boards available in craft stores here in the US. The white both sides with a white foam core is the most popular. There is a black both sides with a black core that I find a superior product and much prefer. Then there are a range of colours. A grey board and blue board, would be relevant in micro layout applications. I've used these for layout frames and sky backscenes. These boards are a nominal 5mm thick. There is also a 11mm thick cork faced board that I use for baseboard surfaces. 
What follows is a short description of my construction method. It has its roots in a method of construction from the seminal English Proto4 (finescale 4mm) layout "Heckmondwike". One of the first layouts to break with the English baseboard tradition of frames made of 2" x 1" pine with 1/2" chipboard surfaces, and use plywood in all aspects of the baseboard construction. Frame and surface. At least that's what I remember. It has really stuck with me. So I present my adaptation here.

The board I have used here is the Elmers Black/white with white foam core. My preferred board is Black, black, and black core. But I thought the contrasting colours would help in the photographs. 
The cutting surface is a section of counter top that is flat and square. A big help in cutting. The finished baseboard will be 19" square, simply because that is the size of the 10mm foam core I had.

A set of strips are cut oversize. Two for each side of the baseboard.

If you are as bad at cutting and measuring as I am, then you'll be thankful you cut the strips too long.

I think you can see how this is developing here. The depth of the thinner strip is 11mm less (the depth of the cork faced board), than the outer strip. The baseboard will rest on this.

This is where things got complicated for me. One lapse in concentration and you've cut a strip the thickness of the foam too narrow, or too wide, and need to cut it again. The layered, intertwined corners add to the strength of the finished unit.

Joints are glued and pinned while they set. I use an extra strength wood glue for this.

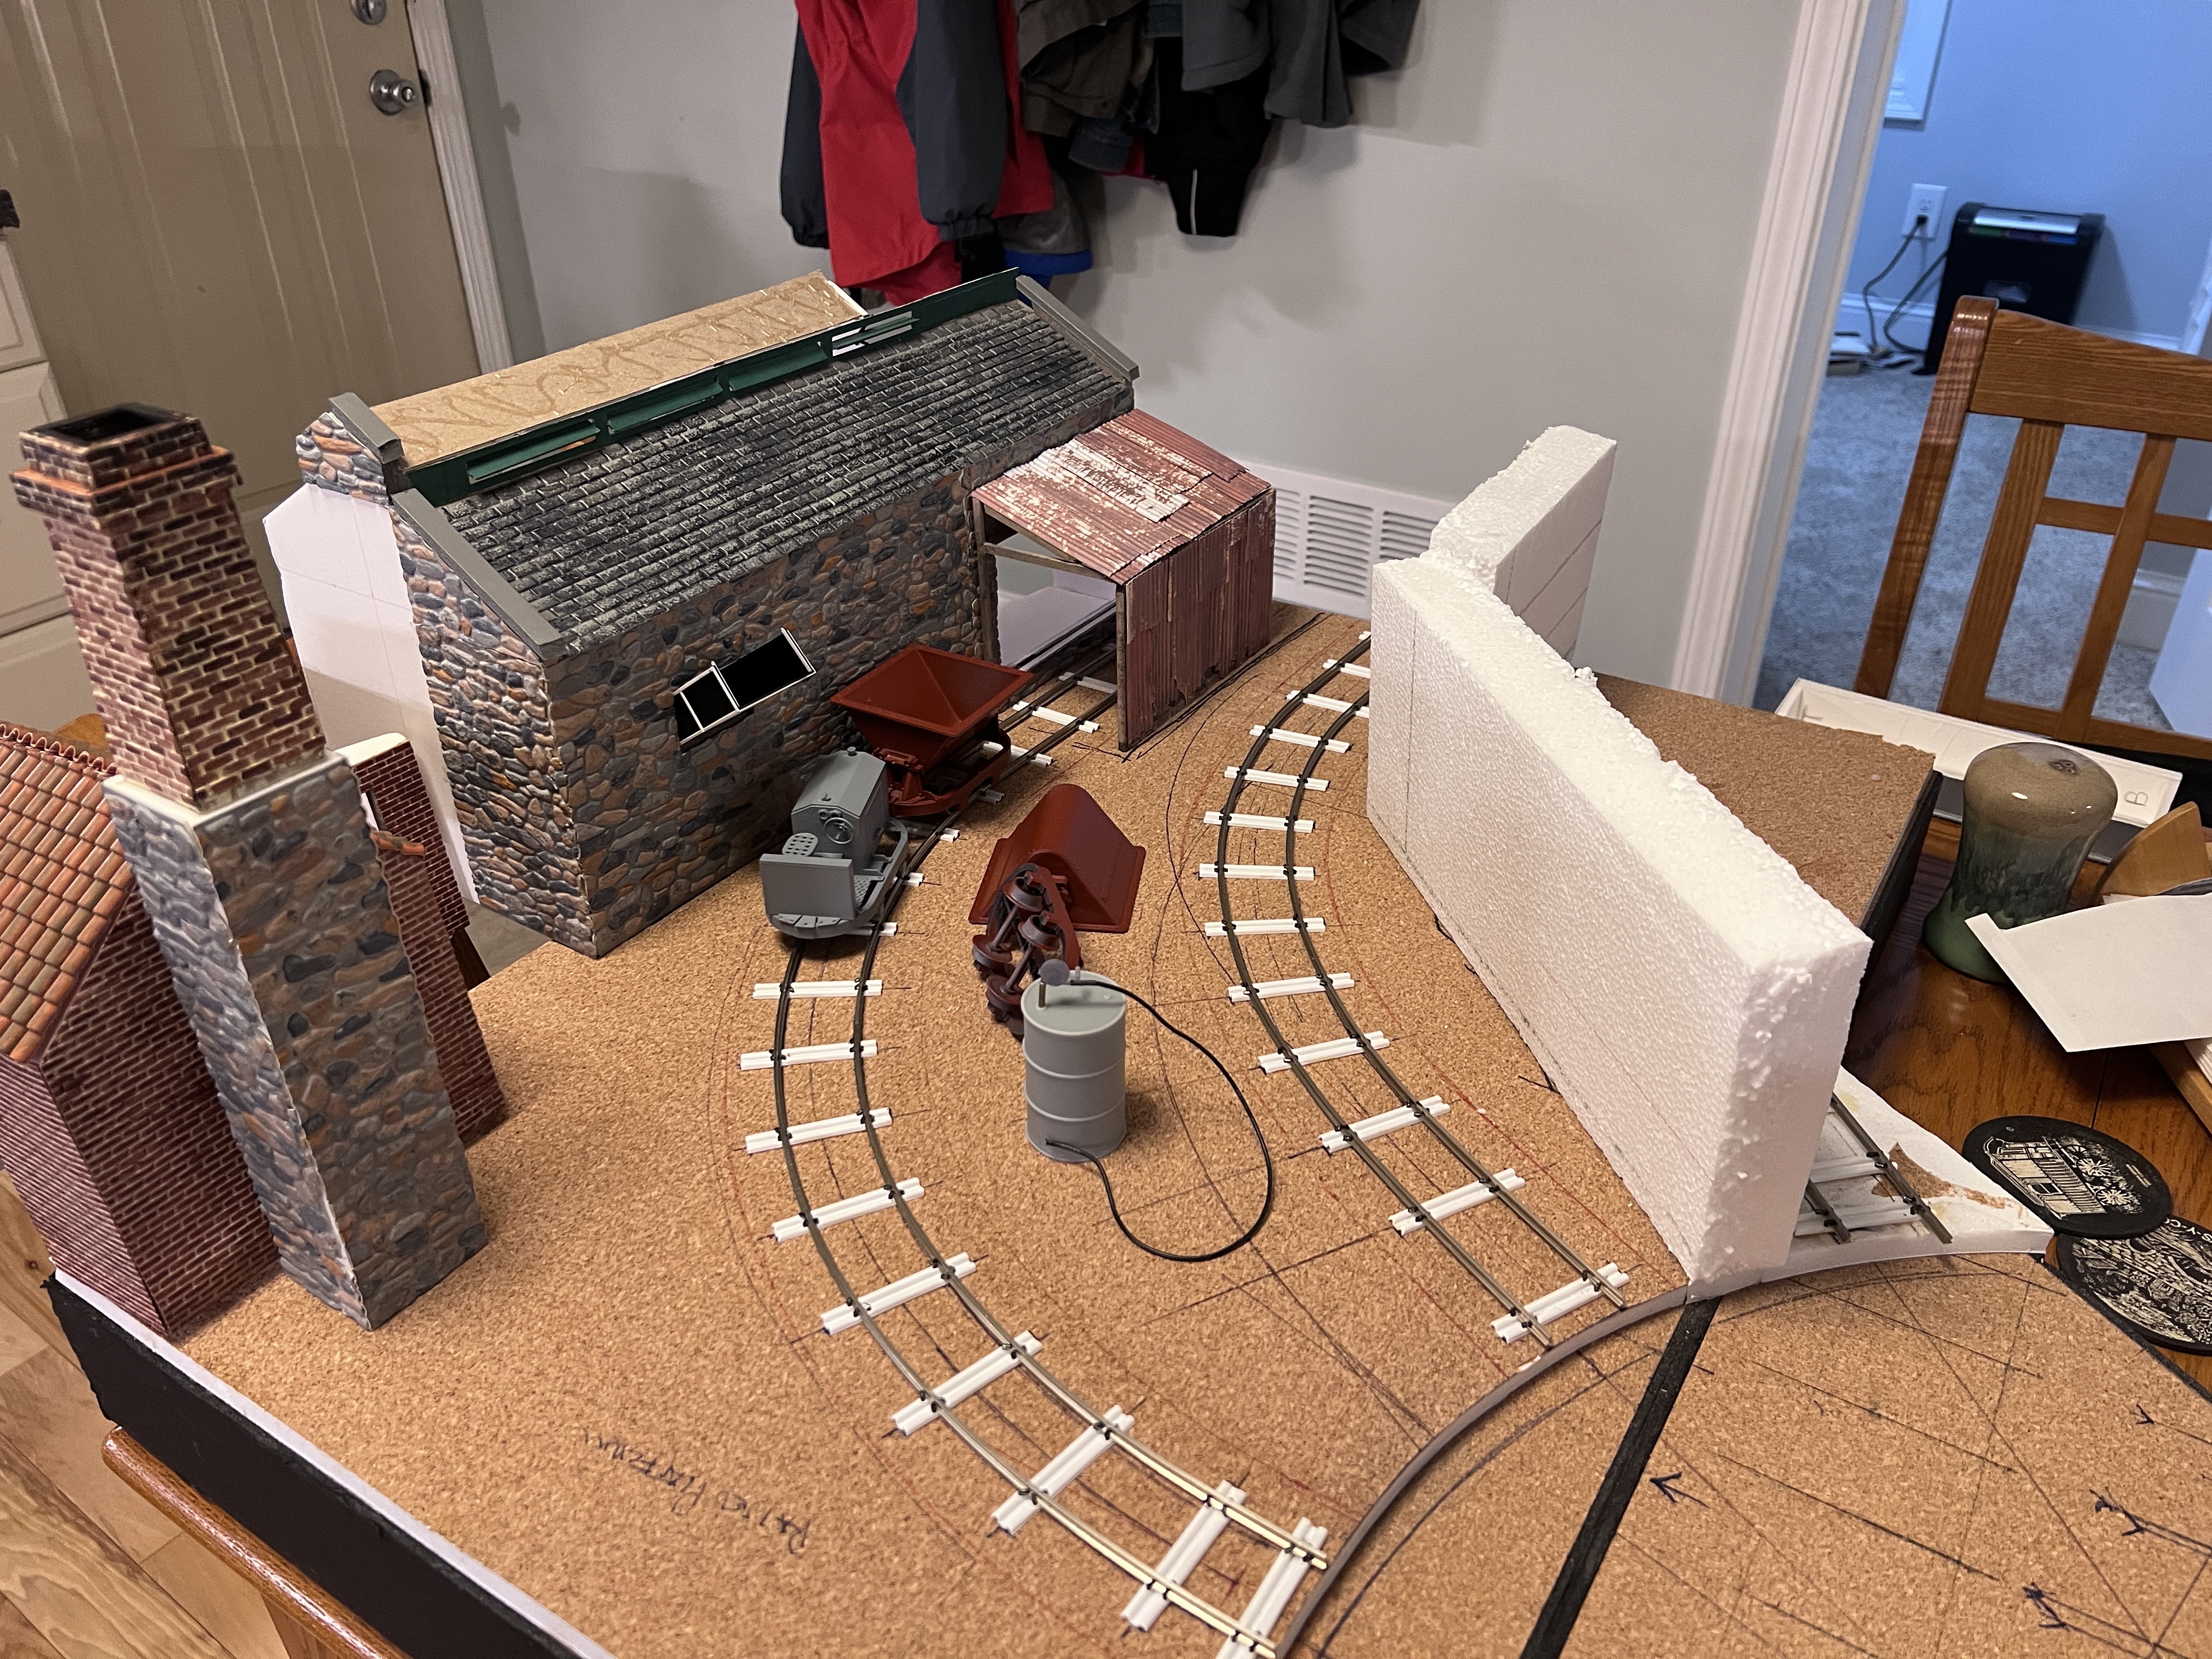
My chosen baseboard surface is the 11mm cork faced board. (Seen here in a layout planning exercise) Being thicker helps the rigidity of the finished baseboard. This thickness needs to be borne in mind during construction.

Once set, I fixed some cross braces in the back. This will guard against any tendency towards twisting or sagging of the baseboard surface.

Voilá! A square, lightweight, warp free, foam core baseboard. Construction is quick and easy. The whole process only took a couple of hours. Some concentration is needed when you are working out how the stepped sides fit inside the ends, so that you can cut the strips to the right size the first time. The voice of experience speaks here. Though it might have been easier if I hadn't made a square baseboard...
The method, is quick, easy and clean. It works for me. I hope it works for you.

Monday, September 5, 2022

Back to the sketchbook

 I made a trip to my local hobby shop (Hub Hobby in Richfield, MN. A 40 mile trip) on Saturday to get some paints to finish off “Huddy”, more on that when it’s finished. While I was there I was rootling through the 1:18 automobile shelves. Let’s face it 1:18 scale is as near as dammit the same as 1:19.05 for 16mm scale. I was still rather keen on a suitably sized car on the layout. A Landy (Land Rover) would be nice, but not surprisingly there wasn’t one around. But what I did see was this:

Do these 1:18 scale tools hold the key to the layout?

Tools. 1:18 scale workshop tools no less. In my blockings in. I had mooted the idea of a workshop in the distance. I like the idea of a workshop scene. I had a very nice one on Purespring Watercress, 

Purespring Watercress workshop

It garnered a lot of attention. Perhaps another one would be in order. With almost scale sized tools, it would be a lot easier. Tool chests, Air compressor, Welding equipment. I looked further and I find that there’s a lot of 1:18 scale automotive workshop equipment out there. 

My mind went to the sketchbook. Now that I have blocked in photo’s that I was very happy with. I could use those as a basis for my iPad musings.

A front three-quarter vision of the layout with workshop

Only the layout operator will get to see this view of the layout
Looking at these I think a workshop scene is a really good idea, and right now I really like the idea of scratch building a 16mm scale pillar drill. It will probably be easier than making a Land Rover.
A workshop scene it is then.


Friday, September 2, 2022

More Blocking In

Wednesday nights blocking in session went really well. A lot of food for thought. This spurred me on for further explorations. 

(1) An overall view. Changes from yesterday might look minimal. But I brought in my 7/8ths inch scale garden shed (now that's a big, little, building) to stand in for the structure I've been calling the boiler house. I like the chimney up front. It helps to create that nook or cranny the viewer can look around to get drawn into the scene. That way I can keep the other structure at the back to reinforce the forced perspective effect.

(2) Down at eye level. The chimney is still nice here and I love the forced perspective in the model. There’s a “layering" of the different scales that I really like. 

(3) Moving the chimney towards the rear is what really accentuates the forced perspective. If I’m honest I think I prefer the chimney at the rear. The chute you can see was for when the building was planned for Cuddle. It tips perfectly into a Gn15 skip. Not so a 16mm scale one. Modification would be in order.

(4)  A Cardboard box stands in for some structure or other. I think a structure here with 16mm scale brickwork would really accentuate the layers of the forced perspective. 

(5) The first picture where I actually don’t like the location of the chimney. I'm feeling cramped. Perhaps something else could be used to create the nook and cranny here.  I did toy with the idea of a 1/18 scale vehicle here, like a Landrover, that was, until I saw the price of one. Don't ask...

(6) Ooh look! There’s a door. I wonder what could be in there? Little details like that ask questions of you and draw you into the layout. You might not be able to see the interior of the building, but you can still be drawn in.

(7) This is a nice view. Properly cluttered up, it could be a nice vignette.

All in all, I think I'm there. I think I have a real idea of how everything needs to come together now. I feel that I may have set myself too much work to get this layout finished for the December deadline of the Cartel challenge. But I think the end product is going to be worth it.

Thursday, September 1, 2022

Blocking in.

The larger scales, that is those over 7mm/1/4" scale, can be mind boggling. The size is one of the toughest things to get your head around when you jump up from the smaller scales. Sure, on its own, a small industrial loco, or skip wagon can sit comfortably in the palm of your hand. But it's the volume of these things when you put them on a layout that causes issues. A jump from 7mm to 16mm is just over doubling the dimensions. But doubling the dimensions of an object increases the volume eight fold. Things all of a sudden have a bulk. You can sketch and plan all you like. But you have to know how your sketch fills three dimensions. That's where I find blocking in so important.

"Blocking in" is just using whatever you have to hand to see how things fit. I enjoy blocking in. It’s like building a layout without building one. In this instance I'm lucky I have some large buildings from Cuddle to use to help visualise things, otherwise I’d be using cardboard boxes as stand-ins for the structures. Here follows the results of an evenings blocking in session.


(1) This is the first arrangement of the structures using what I have from Cuddle. It all actually shapes up quite nicely. I like the Chimney up front even though a one foot tall model chimney would only be 19' the real world. It stands well there. If you're concentrating on the action at the back of the layout, then it will always disappear up out of your  field of view. Like a real chimney would. The big white “wall”. Is it a retaining wall, is it another building? I hope it’s not a building I don’t want to build another big structure. 

(2) How much clutter can I fit in between the tracks? That's a good question to ask. Detritus and waste are always good for creating atmosphere. Something like this is where we can fall into a trap of over cluttering. You think there's a lot of room there for crates and things, forgetting how big things like that are in 16mm scale.


(3) I have mixed emotions about this image. Overall, I find the arrangement of the structures quite pleasing. No particularly long expanses of flat wall, and I really like the way the chimney and boiler house (perhaps ?) protrude into the scene. Creating a nook, (or cranny) to make you wonder what's behind that corner, thus drawing you into the scene. The awning covering the tipping point actually seems a long way away. There's quite the distance there. Perhaps that's the first indications of forced perspective as the corrugations are close to G scale.. 
Clearances are a bit tight going in through the entry, but I think it'd be OK. Then there's the question of what's going to be at the front right to hide the sector plate? If it's going to really going to protrude into the scene, with the boiler house protruding in as well, It makes the viewing area very narrow. Cutting it back, making it a slope with vegetation on it. Perhaps a tree, maybe scrub, Marram Grass, would soften that edge. As it is it’s pretty clear a building wall wouldn’t work there. 

(4) Here I’ve opened out the whole of the front by sending the boiler house to the back. The front of the layout is very open and boring now. But, having a G scale building at the rear really creates a sense of depth. More forced perspective. 
(5) The forced perspective is even more noticeable now you look at the scene head on. Perhaps a tightly controlled viewpoint like this is the way to go. Perhaps I need some things at the front encroaching on the scene to force how the layout is viewed.

All in all a very productive session. I have some good ideas to develop. I have some more ideas whirring around my head as I type this post. Perhaps I'll be blocking in more tonight...

*Fy Merlen Bach*

Winter is coming…The phrase that spawned hundreds of cringeworthy internet memes. To me it means that any model making I do will be confined...