Wednesday, August 30, 2023

Weathering the Loader

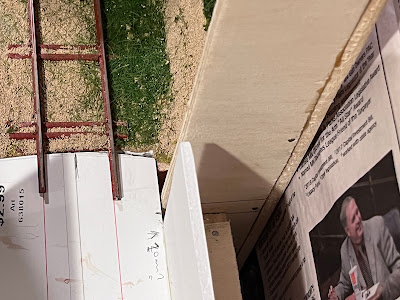
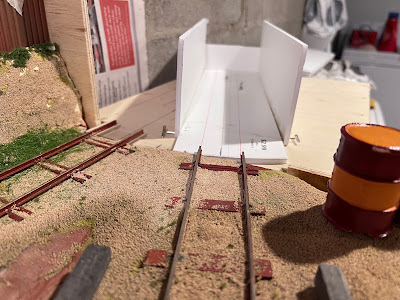
 As you can expect. I couldn’t leave things alone, and had to add some weathering to the loading chute. Weathering is subjective. One person’s weathering masterpiece is another’s primitive daub. My work keeps me happy and lies somewhere between the two extremes.
A light weathering.
As with all my work, I start by giving the model a good scrub down and dry brushing with my favourite Asphaltum acrylic paint. It really kills the plastic feel of the models in my eyes. 
I’ve had this paint for years.

Then I scrubbed it on a bit darker in places, and added dabs of orange to suggest the beginnings of rusting. Finally because this would be a dusty, sandy place, there would be dust and sand collecting in crevices and on horizontal surfaces so I dry brushed some white on there too. I think it needs more of that and probably some sort of sandy colour too. One can get caught up in the minutiae of this process. But right now, this is good enough for me. Don’t you think?
That will do for now


Tuesday, August 29, 2023

Loading chute gets some paint.

At some point I have to stop work on the layout, and start packing my suitcase and camera bag for my holiday. But I couldn’t resist adding a few more rivets to the model (I only added rivets to the faces of the model that you will be able to see), and giving it a coat of paint. Now it looks the part. 

Weathering next. I hope I’ll have the good sense to wait until after my trip back home to do that, but I’m not making any promises there. 
 

Monday, August 28, 2023

Riveting work

Just a short report today. As I’m packing and getting ready for our vacation in the U.K. starting on Sunday. I just booked a couple of tickets for return trips on the Ffestiniog and Tal-y-lyn railways for our days in North Wales. 
One detail that I’d decided to incorporate on the skip loading chute was rivets on the girders. Sixteen millimeter scale is large enough to warrant this level of detail. I had no idea what to use for the rivet heads, but a quick ask around some forums and tiny rhinestone jewels used for decorating fingernails was suggested. I bought a pack from Amazon. 7,200 of various sizes between 1 and 3mm for $8.99 should keep me going for a while.
I figured the easiest way to apply them is a dab of glue on the surface and then put them in police with tweezers. That was pretty much right. I also found that a scalpel to adjust the jewel to its correct spot was a good idea. After 30 minutes dabbing and adjusting I had one side of the loader started.
Can you see them? 
It’s certainly a fiddly job. But right now not too tedious. I certainly have plenty more to add. But it’s a good start. I also don’t doubt that someone, somewhere will tell me the correct pattern of rivet heads. But I don’t care. It creates a good effect, and that will do for me.

Tuesday, August 22, 2023

Traversing

 I’m officially stopping counting the days of construction now. The layout is now at a state of completion where it could go to a show as it is, or with minimal extra work done. Besides, I’ve seen layouts at shows in worse state of completion. So I’m happy with no more counting. We’ll call it 30 days and be done with it. 
I’ve had a couple of questions asked about the construction of the sector plate/train storage. As this is still a work in progress towards a finalized design, the details of the cassette are still under consideration. But, as the most important part of the sector plate is lining up the roads correctly. I can at least offer some views based on my experiences with that.
1. The single most important thing in marking a sector plate is finding the pivot point. That way the track centers line up, and the curved end of the sector plate can swing and not foul anything on the layout, (been there, done that).
It also goes without saying that if you have a curve going into a sector plate you’re probably making unnecessary trouble for yourself. Much like having flexible track joins on curves.
The tracks on my layout are dead straight, so it’s pretty easy to run a ruler along the inside edge of the rail and trace it back on the deck of the baseboard as in this top picture.
2. You draw lines from both sets rails back on the baseboard. Find the middle of them, draw those lines back, and where the track center lines intersect. That’s the pivot point. You should also try to draw as few lines as possible doing is. As you can see I drew plenty of lines, and mis-marked the centre. Which I didn’t discover until I tried to make the deck of the sector plate. 
3. Make a template for the sector plate deck. Decide what size it’s going to be. Cut some material or other (I’ve used foamcore) and mark a curve based on the radius you want from the pivot point. I went for 12” (305mm) on mine, working with the layouts T.L.U. (Train length unit). You might, like I did, have to mark the curve on both the layout and the sector plate deck. I trimmed the edge of the layout to the curve and then the sector plate deck template to the same. It should match pretty perfectly. Now the real test. Pin the sector plate deck though the pivot point. If you’ve done this right, the sector plate should swing perfectly across the baseboard edge. This was where I found out that I had drawn too many lines and marked the wrong pivot point.

4. & 5. The moment I realized I had the wrong pivot point marked. In the top photo everything lines up perfectly. The bottom one leaves a HUGE gap. So it was back to step 1. Re-mark the track lines and centers and carefully mark the new pivot point. This did necessitate a slight trim of the scenery but not much.

6. & 7. Now you can see that everything lines up perfectly. The curved faces of the sector plate and the baseboard meet perfectly. All I have to do is trim the rails back.

8. & 9. Look along the track and you should be able to make out that the rails and the lines of the track on the sector plate deck line up, and the perspective continues seamlessly.  
If you’re feeling brave there’s one last thing you can do to prove that everything is aligned perfectly. Line the deck up with the tracks on the layout. Put the pivot pin (I was using a T-pin) into its hole on the deck and it should drop straight into the pivot point hole on the baseboard. 
There, that’s how I did it. I hope that wasn’t too “how-I-blew-my-nose” for you. But I did go through multiple steps to make sure I did align things correctly.
Now I can finalize the design of the cassettes. They will probably be made from 3/16” (5mm-ish) ply. The pivot and hole will be a bit larger than T-pin size though. 
Finally, for those who are concerned about the cutting away of the baseboard surface to get the curved faces to align. This will be what you can see on the layout. 
If anyone has concerns about sector plates, I hope this eases your fears. I did over complicate things with mine, I thought I had such a good idea, overlapping the sector plate onto the baseboard to help with baseboard join alignment. But perhaps not, I got there without too much problem in the end though. 
I’ll see you another day.


Monday, August 21, 2023

Sit down. Take Stock.

There’s no doubt, the last three days had their stressful moments. Culminating in todays mess. However, I got through it and emerged on the other side. So, I thought it a good idea to pull everything together so I could see just how close to completion the layout is.


Seeing all this makes me feel much better. It was certainly worth the stresses of the last three days.

Day 27-28-29 Building the fiddle yard.

This was always going to be a tough one. I was dreading this more than anything. Adding the sector plate. Making something fit onto the end of the layout. It didn’t need to me much more than a foot square. In the end I went for 13” x 10” (330mm x 250mm). 
On the face of it it was a simple task. Build the frame, put a surface on it, (though that’s not entirely necessary, I just felt better putting one on) and set up the joining of it to the main section case.
Woodworking is never simple with me. You’ll recall my shock at competently building the case. The project used up all my good luck. It was downhill from here on.
Making the template for the fiddle yard end.
I shan’t recount the problems I had. Cutting wood to the correct length, getting the correct angles on the support struts. Even drilling holes for the screws was a problem. I stripped a couple of pozi-drive screwdriver tips and screws. I was at the point of quitting.
“If this screw doesn’t go in, problem free, this time. I’m quitting for the day” I was in the depths of despair. If the screw hadn’t gone in. I would likely have been in tears. Luckily it went in. It’s a shambolic piece of woodworking. But it is on there. Flat and level.
I hope you can’t see all the cock-ups.
I can console myself with the thought that the list of things to do on this layout is now so short, that the layout is almost finished. The wagon loading funnel needs rivets adding and painting, then it can be installed on the layout. Lots of detailing bits and pieces, (a never ending task). 
A system for the unloader needs to be devised. I know it can easily be done by hand. But I don’t know wether to do a hidden manual system or automatic tipping rail. I like to be “hands on” in operating the layout. I could do a simple hidden “pusher” to tip the wagon, or I could try to devise a more complicated system, where a figure could be seen to be tipping the wagon by hand. That would be neat. That would need some serious thought. 
Finally, the train cassettes need to be designed. I’d like an individual cassette to each train. One that could act as storage and protection away from shows, as well as during. I’ll probably have to design and make a few prototypes first. I have some ideas on this. On the strength of the past few days work, they certainly won’t be wooden ones. 

Friday, August 18, 2023

Fiddle yard thoughts Day 26-ish

Much thought has been devoted to the form that the offstage area will take. I have to stop calling it a fiddle yard. That suggests something far grander. I’m just in need of a small area to switch out train cassettes and switch between the two roads. 
After some consideration the best arrangement would be something like this.
Set up sketch
The drawing makes reference to an angled face needed due to the cutaway of the foam baseboard. This photo shows what I mean.
The join area
This was a bit of a cock up at the time. I was looking at the wrong end of the raised area as I lined things up and let the glue set. But right now it doesn’t look so bad as the tab will assist in the location of the offstage area. The rails need to be cut back a smidge, and a little curve cut in the foam, But it should all be good in the end.


Wednesday, August 16, 2023

Planting time. Day 25-ish

After two or three days of making various types of weeds, the time has come to plant them. As a result I also decided that it was time to commit and wrap the layout in its case. It might come apart to be painted but this is it. The layout is in its home. Besides, there will be no way to design, assemble and fit the fiddle yard until the case is done. So it was done. 
Layout enclosed, pelmet in place.
Eagle-eyed viewers will notice a premises sign being tested.
With that sorted out. I got all of my 44 weeds, some white glue and a broggler, (a pointed implement for poking holes in things) to plant them in the ground, and set to work. 
I had no idea if 44 would be enough, so I just poked and planted away. In the end I used 42. (Waits for someone to make a Hitchhikers Guide to the Galaxy reference)…
I saved a couple of larger ones for later, just in case someone at a show wanted to know how they were made. I could make up a little “how I did it” display plinth.
Goldenrod and Yarrow in the scrub
Yarrow around the siding end
Cow Parsley grows around the fence
Perhaps still more are needed. But I want to add some more long grass, and I really would like to try to make some nettles. So there will be more undergrowth around and about yet. But when the overgrown track looks like this, things are certainly looking right.
Typical industrial permanent way.
The next project really must be to get the fiddle yard/sector plate fitted. I’ll save that for next week. 

Tuesday, August 15, 2023

The next big step.


We all progress in this hobby. As we spend more time working on our layouts, we develop. We learn skills.  We become better at them, Then we learn new skills. Things that we thought impossible become easy. The bar becomes raised. Sometimes without even noticing it.
Then one day you do notice it. All the little steps amount to one big step. You’re left wondering how did I get here? 
It was only a few years ago that I learned how to make my own panel track seen in this image. That too was a big step preceded by lots of little steps.
In this image there are many of the little steps since then, that lead to this next big step. 
A 16mm scale Peter Binnie skip. This is a new scale to me. I actually don’t make many kits, and those I have started usually end up unfinished. I have half a dozen Slaters O scale wagon kits in such a state. This is a simple kit, little more than 10 parts so it got finished.
It’s battered and rusty. I don’t weather. I don’t trust myself. I don’t want to ruin really nice trains with some hamfisted dirty streaks. I buy R-T-R trains with weathering on them. The rim of the skip is banged up. As I don’t weather, I never thought about this before. This simple trick was suggested to me by another 16mm scale modeller. It’s a simple fix but it makes the wagon look like it’s been in service a while.
Static Grass. I have never used static grass until recently. While you were all covering your layouts with grass fibers from expensive, or even home built applicators. I was still in the last century using scatter materials. I had convinced myself that these fibers of grass were round whereas a blade of grass had width so the two couldn’t look the same. To a certain extent I still subscribe to that point of view. But the way those long fibers grow around the timber baulk buffer stop looks very pleasing.  
The timber baulk is distressed, something else I hadn’t thought about until recently all you have to do is drag a razor saw blade down it. That’s not hard.
Weeds. The weeds are the last step. I have no idea why I thought modelling individual plants was something I could do. After all, I had seen Roy C Link’s nettles in his Crowsnest Tramway book, and thought to myself. Never.
It just seemed at that moment something I wanted/needed to try. I remembered that I had made many tiny trees for my Hitsu and Gonou T scale layouts. It couldn’t be any more difficult than that. I made about half a dozen, Then another dozen, followed by 20 more. Now I have about 40 weeds, a mix of Goldenrod, Ragwort and Cow Parsley to plant. It’s probably not enough. They are individually identifiable plants. A new skill has been learnt. A new step taken. Strangely, I find myself wanting to model nettles now.
I started to plant a few weeds on the layout. Ragwort at the sand pit end because they like sand. I pushed the skip up against the timber baulk. Just to see what it looked like.
That’s how I got here.
Looking at the scene, and the image, made me pause. I was gobsmacked. Without realizing it I had just raised my bar. All those small steps and decisions have pulled together to create a whole. The scene has a sense of place, an atmosphere. To a certain extent I feel like I’m there. To be honest, I want to go over there and tip that rusty old skip bucket over. 
So I did.
 
So here I am. In a new place. A new realization that I can do whatever I put my mind to. I’m still a long way off the abilities of the true artists of the model railway world. But in my own way I think I’m with them. In spirit at least.


Monday, August 14, 2023

iPhone plant lookup actually identified my work as a plant! Day 23

There is a feature on iPhones wherein you take a photo of a plant or an animal, and the phone will search its database and tell you what you have taken a picture of. So just for a laugh, I thought I’d see what it thought my creations were. To be perfectly honest, I wasn’t expecting anything. So when I ran the picture though the camera and got an answer I was shocked.
It’s Yarrow!
I was aiming for Ragwort, but Yarrow is native to the UK too, so I’ll take that as a win. Next up I tried the one I was proudest of, the Cow Parsley.
Alyssum or Buckwheat
Sadly, it didn’t recognize it as Cow Parsley. But if I was modelling a garden setting in 16mm scale. Then Alyssum would be a plant to have in the flower beds. 
I tried my third different plant..
Goldenrod for the win!
I was amazed. Goldenrod is native to Minnesota and the UK, and it grows along the trail that I run daily. This plant was in my mind as I created these models. To have my miniature creation recognized for what it was intended to be was unreal. 
You can just call me the miniature gardener…
I’ve made about 20 weeds right now, hopefully that will be enough to make a mark on the layout.


Sunday, August 13, 2023

Weeding - Day 22

Making them, not removing them that is. 
One of the great things about modelling in a large scale such as 16mm is that you can do much more than suggest plants you can actually model them, and depending on how skilled you are. With quite some accuracy. I wasn’t too bothered about recreating nettles in painstaking detail like Roy C.Link did on his Crowsnest Tramway layout. But I was keen to try to go a bit further than using commercial products. I wanted to make some of my own. 
Driving around with all the summer flowers, (and weeds) in bloom. It was clear that yellow would be THE colour to use. But how to make the plants?
The secret to the method lies in tree modelling in smaller scales. There are skilled folks out there who use stranded wire twisted and bent to all sorts of shapes to recreate stunningly accurate models of trees. This may go back to G. Iliffe Stokes in August 1958 Railway Modeller. But a much simpler method will suffice for plants like Cow Parsley and Ragwort for example.
Ragwort
Cow Parsley
One thing that is apparent about all these plants in the field is how straying the stalks are. It seemed quite natural to use straight wire to model straight stalks. Keeping the stalks straight during construction was nigh on impossible.
The wire 15 AWG multi stranded hobby wire
The wire was cut to a suitable length and cladding stripped off.  The individual strands of wire were then thinned down into smaller groups of between 4 to 8 strands. These were then twisted together to create the desired shapes, and a little solder was melted into the end of the stem. This I hope will make it easier to plant the stems into the baseboard,
Strands ready to be twisted together.
Twisted strands ready to receive solder
I was feeling pretty good about the way things were going. Nothing had been too difficult. Twisting the wire strands had been fiddly, then I remembered that I had made a bunch of  trees for my T scale layout Gonou, culminating in flowering cherry trees. Happy with the way the stalks were looking it was time to foliate them.
Step 1. A spray of a green paint to get rid of the copper wire colour
Step.2 A spray with Woodland Scenics scenic cement, and a sprinkle with fine foam

Final step. Dab the ends of the stalks with white glue and sprinkle yellow (for Ragwort) and white (for Wild Parsley) scatter on the ends.
I’ve only made a dozen so far. I just made a few to see how it went. To see if I enjoyed it enough to do a load more. I don’t know how many I’ll need. But these look the part, and when grouped together will probably look quite convincing.
Another new skill learnt.


Wednesday, August 9, 2023

Day 21. All in all it’s just another brick in the wall

Those were the words running though my head as I was putting together the sand bin for the layout. You can see why… I marked out the courses to help me see them as I scribed the board. There’s no doubt about it. It’s a Pink Floyd Wall. 
So they weren’t bricks in the wall they were breeze blocks
I have been thinking about the sand bin for a long time. What’s the best way to model it? This is 16mm scale. The breeze blocks (cinder blocks) such a bin would be made from have size. Approximately 22mm x 11mm x 11mm in 16mm scale. So there’s no cutting corners really. 
This is my first attempt at recreating the bin. Using foamcore board. This board is too thin to represent the older thicker concrete breeze blocks. But it’s the correct thickness for the more modern, lighter, cinder blocks. So it might work. This is going to be something that will be moved on and off the layout as it gets filled. So it also needs to be quite sturdy and to take the weight of the Woodland scenics ballast that I will be tipping. Some testing of how much handling the bin will take is needed.

There’s one other thing that the structure looks like in its current state. A urinal at a lower league English Football ground…

Tuesday, August 8, 2023

Day 20. Casing the joint.

It had to happen sometime. The display case had to be started. As the layout progresses, the time when all my hard work needs to be properly protected becomes more important. Case in point being yesterday’s incident with the tipping dock. Not that a protective case would have helped in that instant. I just don’t want to go through any more repairs to things. So the case had to be built.
As you know my woodworking skills are severely lacking so a monumental task like this has to be done when I am in the right frame of mind. Perhaps yesterdays occurrence helped in that regard. But as I started marking up the 1/4” ply. I felt pretty good. Then I started checking and double (event triple and quadruple) checking measurements. I measured a distance in inches and then the same distance in millimeters. 
I may have mentioned before that I have dyscalculia, so any dealings with numbers are fraught with issues. It was tough. Dyscalculia is not number dyslexia. It’s difficulty in dealing with the processing of numbers. Basic addition is OK. Anything beyond that and I struggle. Anything smaller than an eighth of an inch, and forget it. If course I should be working in metric, (Dammit so should America). But when everything is measured in imperial, converting is hard work and mentally exhausting.
But after a two and a half hours, I had cut 5 pieces of plywood to the correct (or near enough correct) shapes and sizes, and much to my amazement everything seemed to fit together. 
Front left view
Front right
From the rear.
After a few hours sitting and staring at the photographs and thinking things over. I have come to the following conclusions:
1. I don’t know how on earth I managed to get this all to fit together.
2. The rear uprights are only 2” deep, they should probably have some bracing against them in order to keep the structure rigid.
3. The split ground level is problematic. The window depth is about right when looking at the higher ground level. But very deep at the lower level. 
4. I wonder if an extra brace at the front would be needed. A thin piece of barely noticeable tube giving extra support. (The front right photo seems to show something like that, with the way the shelving unit behind it lined up).
5. Lighting inside the frame/box. Some four foot lengths of 2” x 1” or smaller, running the length of the layout with LED light strips like these affixed to them to light the layout. Would they also help hold the cabinet square?
5. I rested the layout on our grill to take the photographs. The track level is 58”.  I like the height.
6. Still undecided about what to to about the backscene. As I prefer to be “hands on” with the operation of the loader, tipper and couplers an open back is preferable.
7. Seriously, how on earth did I manage this?
Now, the next task is to work out how to fit a sector plate/fiddlestick to the side. Though I might wait a couple more days before doing any more woodworking.

Monday, August 7, 2023

Day 19. Dodged a bullet

I had an enforced long break for the layout over the past four days. I had the not most pleasant prep for a routine surgery. Most I think will know what I’m talking about. It basically entails overdosing on laxatives… 
Anyway, today it was back to business as usual. The plan being to add long static grass to the layout. So I stripped everything off it and set to work.
You always think that when you have put things out of the way. That you’ve put them WELL out of the way. Nowhere near where you’ll be when working on your task. 
Then you go over to where you’d left something. The tipping dock for example, and forget that it’s there.

And…

Well let’s just say I was not a happy camper as I heard it hit the floor. The air was not blue, just silent as a wave of shock and disbelief that this had happened, rushed over me.
I dared not look though, lest I burst into tears thinking about all the work I had put into this centerpiece structure.

But I would have to look sometime…
Oh.
That’s not too bad.
I had expected to see it smashed into smithereens. Hand rails and legs all reduced to their consistent parts. 
It wasn’t. 
I don’t know if it was due to my constructional techniques or what. But the damage was manageable. None of the legs were reduced to their component parts, and only four handrails had become detached from the posts. Some of them still had the locating pins in place. Enabling me to easily fix everything back together. I lost one post. But I had several spares on hand.
Fixing the damage
I shall take my time fixing it. But it could have been so much worse.
As for the static grass. That’s not looking too bad either.
This is starting to look like neglected, industrial permanent way
Only my second attempt at static grass but looking promising
We live to work another day.


*Fy Merlen Bach*

Winter is coming…The phrase that spawned hundreds of cringeworthy internet memes. To me it means that any model making I do will be confined...