I’m officially stopping counting the days of construction now. The layout is now at a state of completion where it could go to a show as it is, or with minimal extra work done. Besides, I’ve seen layouts at shows in worse state of completion. So I’m happy with no more counting. We’ll call it 30 days and be done with it.
I’ve had a couple of questions asked about the construction of the sector plate/train storage. As this is still a work in progress towards a finalized design, the details of the cassette are still under consideration. But, as the most important part of the sector plate is lining up the roads correctly. I can at least offer some views based on my experiences with that.
 |
| 3. Make a template for the sector plate deck. Decide what size it’s going to be. Cut some material or other (I’ve used foamcore) and mark a curve based on the radius you want from the pivot point. I went for 12” (305mm) on mine, working with the layouts T.L.U. (Train length unit). You might, like I did, have to mark the curve on both the layout and the sector plate deck. I trimmed the edge of the layout to the curve and then the sector plate deck template to the same. It should match pretty perfectly. Now the real test. Pin the sector plate deck though the pivot point. If you’ve done this right, the sector plate should swing perfectly across the baseboard edge. This was where I found out that I had drawn too many lines and marked the wrong pivot point. |
 |
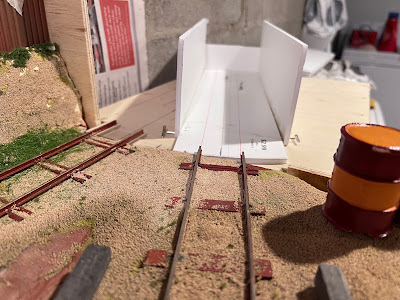
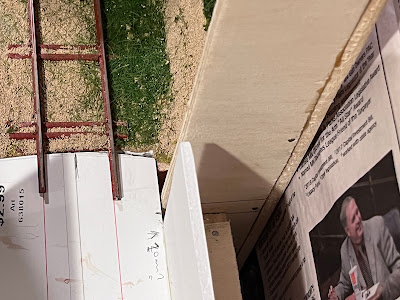
| 6. & 7. Now you can see that everything lines up perfectly. The curved faces of the sector plate and the baseboard meet perfectly. All I have to do is trim the rails back. |
 |
| 8. & 9. Look along the track and you should be able to make out that the rails and the lines of the track on the sector plate deck line up, and the perspective continues seamlessly. |
If you’re feeling brave there’s one last thing you can do to prove that everything is aligned perfectly. Line the deck up with the tracks on the layout. Put the pivot pin (I was using a T-pin) into its hole on the deck and it should drop straight into the pivot point hole on the baseboard.
There, that’s how I did it. I hope that wasn’t too “how-I-blew-my-nose” for you. But I did go through multiple steps to make sure I did align things correctly.
Now I can finalize the design of the cassettes. They will probably be made from 3/16” (5mm-ish) ply. The pivot and hole will be a bit larger than T-pin size though.
Finally, for those who are concerned about the cutting away of the baseboard surface to get the curved faces to align. This will be what you can see on the layout.
If anyone has concerns about sector plates, I hope this eases your fears. I did over complicate things with mine, I thought I had such a good idea, overlapping the sector plate onto the baseboard to help with baseboard join alignment. But perhaps not, I got there without too much problem in the end though.
If anyone has concerns about sector plates, I hope this eases your fears. I did over complicate things with mine, I thought I had such a good idea, overlapping the sector plate onto the baseboard to help with baseboard join alignment. But perhaps not, I got there without too much problem in the end though.
I’ll see you another day.


No comments:
Post a Comment